Tuesday, June 17, 2008

Fondant or Fondon't??

Well, this was my very 1st EVERYTHING with fondant: My first time handling it, my first time making it and my first time tasting it. Yes, I admit it. I've NEVER tasted fondant before. I come from a world of whip cream fantasies and buttercream dreams. Even my wedding cake was made of buttercream. I was completely turned off by the idea of having Play-doh on a cake. I mean, that's what EVERYONE always said it tasted like. So, experimenting here and there with baking, in general and what not got me to thinking about the fact that if I want to become a professional cake decorator then I have to learn how to work with fondant. What better time than the present ,right?


Here's the recipe I used:


http://allrecipes.com/Recipe/Rolled-Fondant/Detail.aspx


Here is a tweaked, slightly cheaper version of the original w/ step by step photo's of course:

Ingredients
1 (.25 ounce) package unflavored gelatin
3 tablespoons cold water
1/2 cup corn syrup (Caro Syrup)
1 tablespoon glycerin
2 tablespoons shortening
1 teaspoon vanilla extract
8 cups sifted confectioners' sugar


Combine gelatin and cold water; let stand until thick.


Place gelatin mixture in top of double boiler and heat until dissolved.


Add glucose and glycerin, mix well.Stir in shortening and just before completely melted.


Remove from heat and stir in vanilla. Mixture should cool until lukewarm. Place 4 cups confectioners' sugar in a large bowl. Make a well in the center.


Using a wooden spoon, stir in the lukewarm gelatin mixture.


Mix in sugar and add more a little at a time, until stickiness disappears.


Knead in remaining sugar.


Knead until the fondant is smooth, pliable and does not stick to your hands. If fondant is too soft, add more sugar; if too stiff, add water (a drop at a time). Use fondant immediately or store in airtight container in fridge. When ready to use, bring to room temperature and knead again until soft.


Whew.....okay, now that we've done that it's time to roll out this sucker and lay it on the cake.


The frosted cake


The fondant rolled out


The fondant on the cake (before trim)


The fondant on the cake (after trim)


Color being added to the leftover fondant


Colored fondant being cut into shapes


At some point, my hands became far too sticky so the step-by-step photo's had to cease for the better benefit of my camera, lol. Okay, don't laugh but....here's the finished product:


Well, needless to say, I've got ALOT of practice work ahead of me. Tomorrow I will post about my errors, mishaps, opinions of fondant and ways to possibly improve. In the meantime, I'm going to go finish celebrating my 2nd anniversary with my hubby!

Wednesday, June 11, 2008

Knock, Knock....Who's there?

Hey guys. I just want to check in with everyone to let you know that I am fine. The past month has been interesting to say the least. As stated in my previous post, I started a new job. My hours are helacious (1:30pm-10pm) which has been very hard getting adjusted to and I encountered a brief health issue (thank goodness it was brief) and now I'm back @ 100%. I am pleased to say that posting will resume back to normal this weekend. I just want to thank everyone for checking up on me and for still peeking in to the blog to see if there have been any updates. I haven't given up on that dream one bit you guys. I just got side tracked for a bit. I can't wait for my new project this weekend!! Not baking has been absolutely disturbing to me!! My KitchenAid stand mixer actually has dust on it......Yeah, that's right people, dust!!


Once again, thanks for sticking with me and I can't wait until the weekend! It's 2am right now in my neck of the woods so I'm going to hit the hay now!

Wednesday, May 7, 2008

Checking in on the dream

I realized that I do quite a bit of posting about the SWEET but not much posting at all about the DREAM aspect in this journey of mine. It feels kinda nice to just write about this journey and the obstacles that I've overcome along with the ones that are ahead of me. I know this post may not be as interesting as something slathered in chocolate or swiss meringue buttercream but it's certainly therapeutic for me!

Well, I was accepted into the Orlando Culinary Academy, something I am very excited about. Attending will give me soo many opportunities, including a change of scenery.......BUT....there are few obstacles that have me a little worried, mainly the cost of the education. It's pretty steep and while the idea of being a Certified Pastry Chef is very exciting, the idea of being in debt is not so exciting. There are other options out there that I could obtain for a fraction of the cost but is it worth it? I recently started a new job that I'm rather fond of (at the moment anyway, lol) that requires 6 months of employment in your current position before you can become eligible for transfer so that gives me more time to look over my plans and make possible readjustments. I plan on using this time to look at what other institutions (community colleges or other culinary programs) may have to offer. Spending more time researching this could save me thousands of dollars and I'm always down for saving money.

The great thing about all of this is that I have an amazing husband who's supportive of my plans and is more than willing to pack up and move to the destination of my choice to pursue my dream. The new company I work for has various locations throughout the U.S. (and abroad) so I can go practically anywhere. I'm a southern gal so I don't plan on going too far away. Atlanta? Texas? Who knows!


No matter the choice, they better be ready for me because once I arrive there will be no stopping me!

Sunday, April 27, 2008

Daring Bakers Challenge: Cheesecake Pops


Let me just start by saying, YUMMY!!!! Okay, this month's challenge was delicious cheesecake pops. I was pretty excited about this challenge for two reasons:


1. This is my 2nd DB challenge.
2. I've NEVER made cheesecake before!!


My baking desires have always led me in directions other than cheesecake. I can honestly say I've never even thought about making it up until I saw the proposed challenge. This recipe has totally changed that for me. I was somewhat surprised at how simple it was to make cheesecake. I was NOT surprised at how difficult it would be to roll those pesky little balls.


As much as I would've loved to take photos of me actually rolling the balls, I care about my camera a little to much to get cheesecake stuck in every nook and cranny of it. Anyhoot, I decided to go with a blue and brown color scheme (my favorite color combination) for my challenge.
Here's a few pics of the different toppings I used which included chopped pecans, candy crystal sprinkles, chocolate jimmies and graham cracker crumbs.


Check out the recipe below:


Cheesecake Pops

Makes 30 – 40 Pops

5 8-oz. packages cream cheese at room temperature

2 cups sugar

¼ cup all-purpose flour

¼ teaspoon salt

5 large eggs

2 egg yolks

2 teaspoons pure vanilla extract

¼ cup heavy cream

Boiling water as needed

Thirty to forty 8-inch lollipop sticks

1 pound chocolate, finely chopped – you can use all one kind or half and half of dark, milk, or white (Alternately, you can use 1 pound of flavored coatings, also known as summer coating, confectionary coating or wafer chocolate – candy supply stores carry colors, as well as the three kinds of chocolate.)

2 tablespoons vegetable shortening

(Note: White chocolate is harder to use this way, but not impossible)


Assorted decorations such as chopped nuts, colored jimmies, crushed peppermints, mini chocolate chips, sanding sugars, dragees) - Optional

Position oven rack in the middle of the oven and preheat to 325 degrees F. Set some water to boil.

In a large bowl, beat together the cream cheese, sugar, flour, and salt until smooth. If using a mixer, mix on low speed. Add the whole eggs and the egg yolks, one at a time, beating well (but still at low speed) after each addition. Beat in the vanilla and cream.

Grease a 10-inch cake pan (not a springform pan), and pour the batter into the cake pan. Place the pan in a larger roasting pan. Fill the roasting pan with the boiling water until it reaches halfway up the sides of the cake pan. Bake until the cheesecake is firm and slightly golden on top, 35 to 45 minutes.

Remove the cheesecake from the water bath and cool to room temperature. Cover the cheesecake with plastic wrap and refrigerate until very cold, at least 3 hours or up to overnight.

When the cheesecake is cold and very firm, scoop the cheesecake into 2-ounce balls and place on a parchment paper-lined baking sheet. Carefully insert a lollipop stick into each cheesecake ball. Freeze the cheesecake pops, uncovered, until very hard, at least 1 – 2 hours.

When the cheesecake pops are frozen and ready for dipping, prepare the chocolate. In the top of a double boiler, set over simmering water, or in a heatproof bowl set over a pot of simmering water, heat half the chocolate and half the shortening, stirring often, until chocolate is melted and chocolate and shortening are combined. Stir until completely smooth. Do not heat the chocolate too much or your chocolate will lose it’s shine after it has dried. Save the rest of the chocolate and shortening for later dipping, or use another type of chocolate for variety.

Alternately, you can microwave the same amount of chocolate coating pieces on high at 30 second intervals, stirring until smooth.

Quickly dip a frozen cheesecake pop in the melted chocolate, swirling quickly to coat it completely. Shake off any excess into the melted chocolate. If you like, you can now roll the pops quickly in optional decorations. You can also drizzle them with a contrasting color of melted chocolate (dark chocolate drizzled over milk chocolate or white chocolate over dark chocolate, etc.) Place the pop on a clean parchment paper-lined baking sheet to set. Repeat with remaining pops, melting more chocolate and shortening (or confectionary chocolate pieces) as needed.

Refrigerate the pops for up to 24 hours, until ready to serve.


I chose to halve the recipe since I didn't desire to add an additional 10lbs onto my derriere this weekend. This can be done in a standard 8inch cake pan. Even after cooking half of the recipe it STILL took about 1 hour to cook. After reading that some DBers had trouble along the way I was a little worried but I must say I thoroughly enjoyed this recipe and the entire process of turning the cheesecake into pops. Maybe I have somewhat of an unfair advantage due to my past Cake Ball experiments but this truly was a breeze. I mean, the cheesecake is definitely sticky and a bit of a pain to roll into balls but it was more amusing than it was frustrating.


Thanks to Elle and Deborah for choosing such a fabulous challenge. I can't wait to see what's in store for the next challenge!!


*update* These little cuties have been featured on Tastespotting's Best of the Week list!! Whoo Hoo!

Sunday, April 20, 2008

Chocolate Chip Blondies


No.....not THOSE Blondie's, THESE Blondies!!


These were very tasty and didn't make it through the weekend. I made these on Saturday and they were non-existent by Sunday evening. Turns out these happen to be a favorite treat of my DH (dear husband). The best thing about all of this is the free promotion that I receive when he takes my goodies to work with him. I've developed quite the reputation down at his workplace which feels kinda nice. Check out the recipe below:


Chocolate Chip Blondies

1/2 cup plus 2 tbsp butter
2 cups brown sugar
2 eggs
1 1/2 tsp vanilla
2 cups flour
1 1/2 tsp baking powder
1/2 tsp salt
1/2 cup chopped walnuts
1/2 cup semisweet chocolate chips

Place butter, brown sugar, eggs and vanilla in mixer bowl. Mix for 1 minute, scraping the bowl when needed. Add flour, baking powder and salt. Beat 15 seconds. Stop and scrape bowl then continue to blend for an additional 15 seconds. Add walnuts and chocolate chips, mixing just until combined. Press dough into 13x9x2 inch greased and floured pan. Bake at 350 degrees for 20-25 minutes. Cool in pan then cut into bars.


Saturday, April 12, 2008

Shortbread fingers


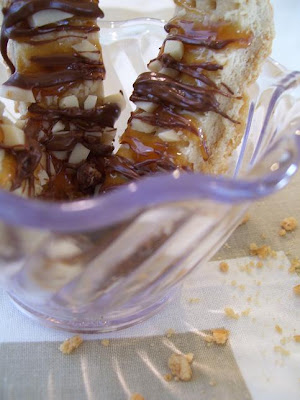
Have I ever mentioned how much I love shortbread?? I mean, it's the most simple thing to make yet it's soo tasty! I make it quite often and to be honest with you, it's simplicity stopped me from posting about it.......until this morning when I made some and decided I should share it with you! Check out the step by step instructions below WITH photos.


Cookie
1/2 cup butter, softened
1/4 cup powdered sugar
2 tablespoons firmly packed brown sugar
1 1/4 cups all-purpose flour
1/4 teaspoon salt
1/4 teaspoon baking powder


Topping
1/3 cup caramel ice cream topping (or make your own like I did!)
1/4 cup slivered almonds, coarsely chopped
2oz. milk chocolate, chopped


Preheat oven at 325 degrees. Line an 8-inch square pan with foil (be sure to leave some hanging over the edge).


Combine butter, powdered sugar and brown sugar in large bowl. Beat at medium speed until creamy.


Reduce speed to low, adding flour, baking powder and salt, beating until combined.


Press dough into prepared pan and prick with fork in even intervals.


Bake for approx. 25 minutes or until light brown. Using foil, remove shortbread from pan.


Immediately cut into desired pieces. Place caramel topping in small saucepan. Cook over medium heat, stirring constantly, until caramel has slightly thickened, (about 3 minutes).


Remove from heat and drizzle caramel over cookies. Sprinkle with almonds.


Allow to cool completely. Melt chocolate until soft, using microwave or stovetop. Stir until smooth, drizzle over cooled cookies. Let stand until set.


The result: A tender, sweet, chocolately treat with a hint of salt that takes the edge off the added sweetness. Morning coffee approved!! Reminds me of a Twix somewhat.


Monday, April 7, 2008

We're back up....for now!

Thanks to all of you that emailed me in regards to my site being down yesterday and today. My website is going through a few changes but due to technical difficulties those changes have been postponed. Thanks for your patience.

I will have a new post up this week so thanks for reading!!

 
template by suckmylolly.com